Welcome to Side Wrench! This guide walks you through setting up the app and creating your first work order. It takes about five minutes.
The Three Tabs
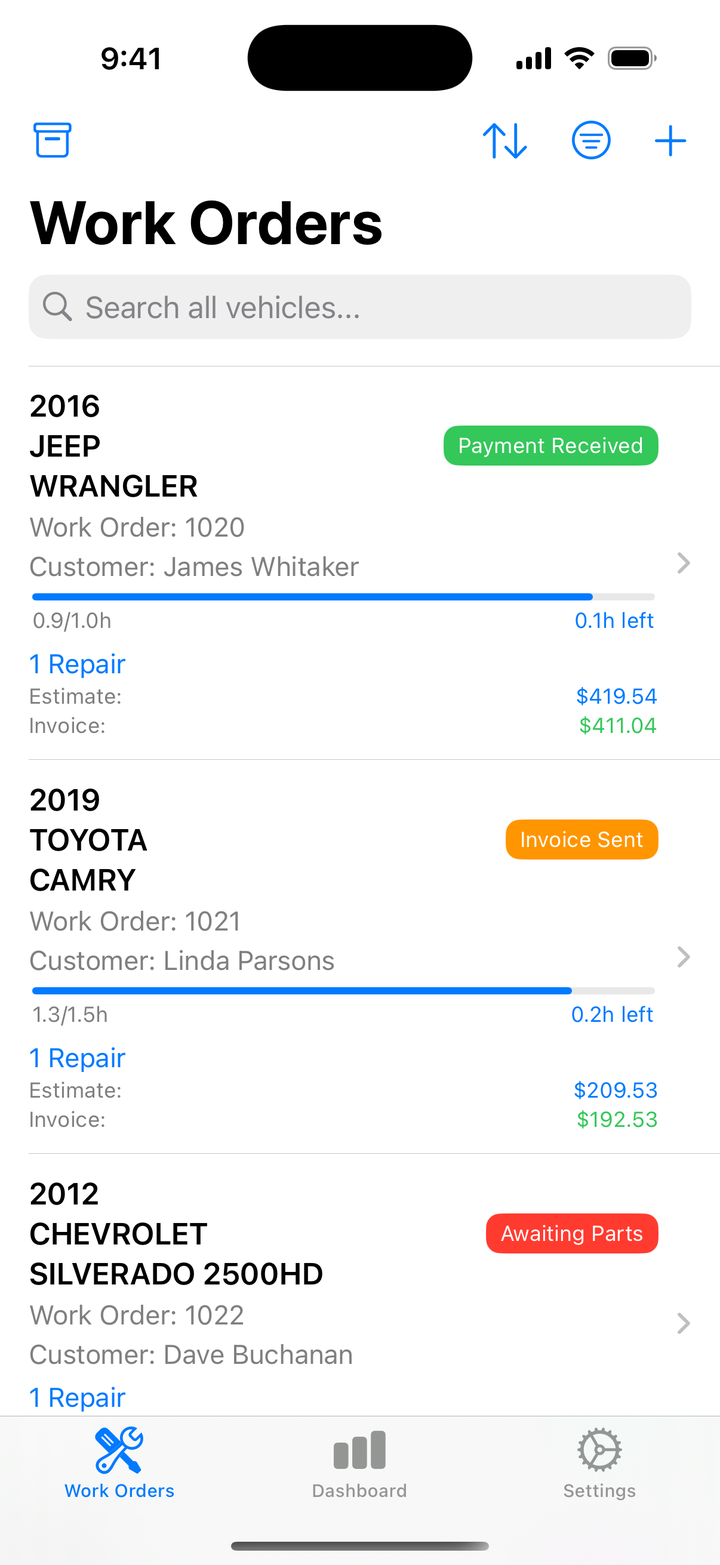
Side Wrench is organized into three tabs along the bottom of the screen:
- Work Orders 🔧 — your list of vehicles and jobs. This is where you’ll spend most of your time.
- Dashboard 📊 — revenue, payments, outstanding balances, and profit reports.
- Settings ⚙️ — your rates, company info, subscription, and data export.
On iPad, the Work Orders tab uses a split view: the list on the left, the selected work order’s details on the right.
First-Launch Setup
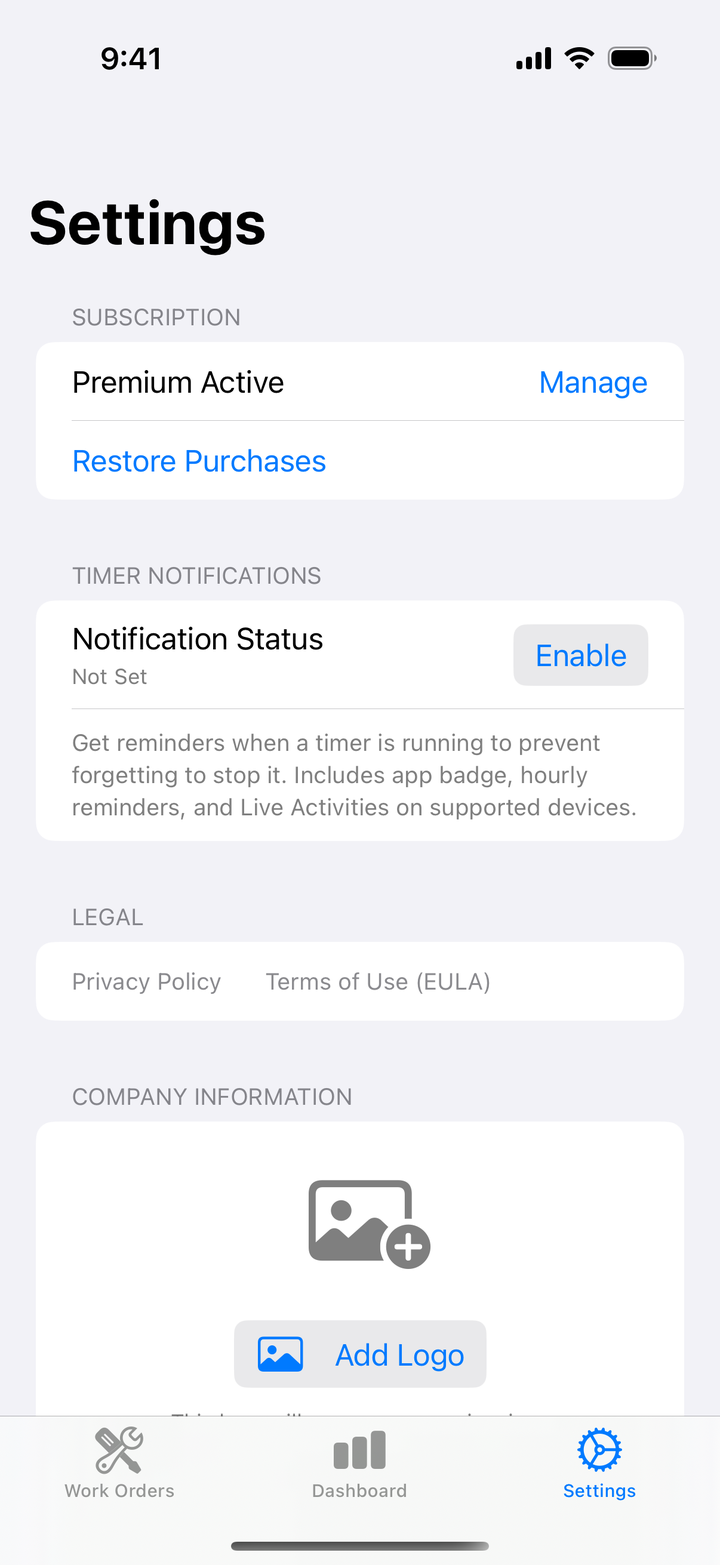
Before your first job, take a minute in the Settings tab to match the app to your business:
1. Set Your Labor Rate
Enter your hourly rate (for example, $85.00). Every repair’s labor cost is calculated from this rate.
2. Set Your Parts Markup
Choose Percentage (e.g., add 30% to your cost) or Fixed Amount (add a set dollar amount per part). The markup is applied automatically whenever you add a part.
3. Set Your Sales Tax Rate
Enter your local sales tax rate (for example, 9.25%). Tax is calculated on the invoice total.
4. Add Your Company Info
Enter your business name, address, and phone, and add a logo if you have one. This appears in the header of every PDF invoice you generate.
Creating Your First Work Order
Step 1: Tap +
In the Work Orders tab, tap the + button in the top corner. (On iPad with a keyboard: press ⌘N.)
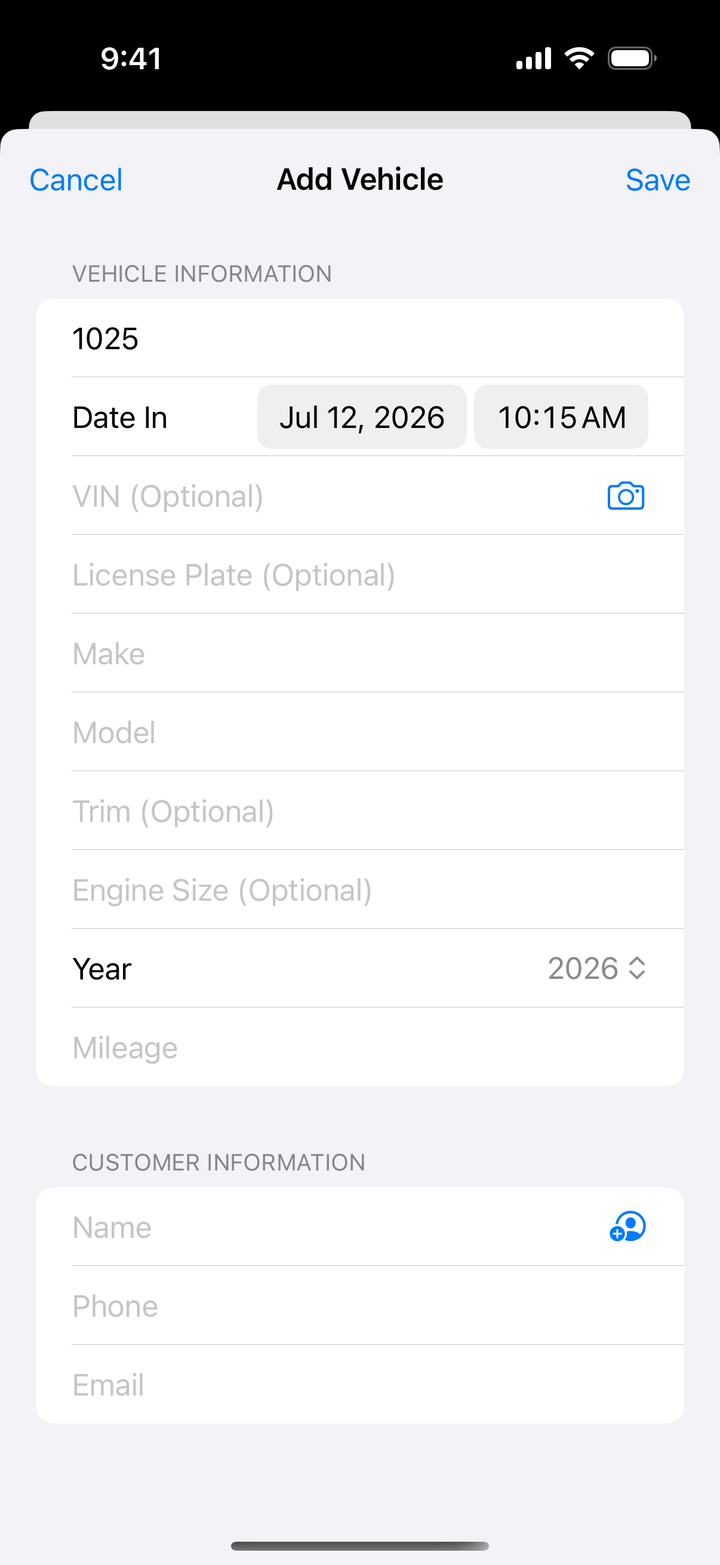
Step 2: Enter Customer Info
Fill in the customer’s name, phone, and email. Name is the important one — phone and email let you call or message them right from the work order later.
Step 3: Enter Vehicle Info — or Scan the VIN
Tap the camera icon next to the VIN field and point your camera at the VIN. Side Wrench reads both barcodes and the printed VIN text, then automatically fills in the year, make, model, trim, and engine.
Tip: The VIN is usually on a sticker inside the driver’s door jamb or on a plate at the base of the windshield.
No signal in the shop? No problem — if the VIN lookup fails, just enter the vehicle details manually and save. Nothing blocks you.
Step 4: Save
Tap Save. Your new work order opens, ready for repairs.
Adding Your First Repair
- From the work order, tap Add Repair.
- Enter a description — be specific: “Replace front brake pads and rotors” beats “brakes”.
- Enter your estimated labor hours — this is what the customer’s quote is built from.
- Tap Add Part for each part: name, quantity, your cost, and optionally the supplier. Your markup is applied automatically.
- Save. Add as many repairs to a work order as the job needs.
Understanding Status Colors
Every work order carries a color-coded status so you can read your whole list at a glance:
| Status | Color | Meaning |
|---|---|---|
| Estimate | 🟣 Purple | Waiting on customer approval |
| In Progress | 🔵 Blue | Work is being done |
| Awaiting Parts | 🔴 Red | Waiting for parts to arrive |
| Invoice Sent | 🟠 Orange | Billed to the customer |
| Payment Received | 🟢 Green | Job complete and paid |
What’s Next?
- Timer & Labor Tracking — start logging real hours with the built-in timer
- Work Orders — statuses, search, sorting, filtering, and archiving
- Invoicing & Export — turn a finished job into a professional PDF invoice
Tips for Success
- Scan VINs whenever possible — faster and more accurate than typing
- Use the timer — compare actual hours against your estimates to quote better
- Update status as you go — your list becomes a live picture of the shop
- Archive finished jobs — keeps your active list clean while preserving the history